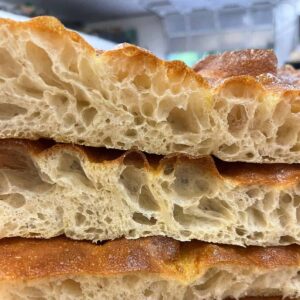
Sandwich Focaccia
A two-day focaccia that uses cold fermentation to build flavor. Sturdy and full of air pockets, it’s ideal for sandwiches.This recipe is a two-day process. Please note that there are instructions for "Day 1" and "Day 2".The equipment section lists only the specific 'specialty' items needed for this recipe. Additional bowls, spoons, cups, and spatulas may also be required. Please use a scale for the best results.
Equipment
- KitchenAid Mixer w/hook attachment
- Kitchen Scale
- 9x13 pan (see Pans for Focaccia)
- Bench Scraper
- Parchment Paper (see note1)
Ingredients
Mix Together
- 254 g Water #1 Cold from fridge
- 170 g Bread Flour
- 170 g All Purpose Flour
- 3 g Instant Yeast See note2
- 3 g Granulated Sugar
2nd Water (Bassinage), Salt & Oil
- 7 g Salt
- 28 g Water #2 Cold from fridge
- 30 g Olive Oil
Brush After Baking
- Extra Virgin Olive OIl as needed
Instructions
DAY 1 - MAKE DOUGH
Combine first five ingredients
- Add the first portion of water to the KitchenAid bowl. In a separate bowl, combine the bread flour, all-purpose flour, yeast, and sugar, then add the dry ingredients to the water.
- Place the KitchenAid bowl on the mixer and mix on low speed using the dough hook attachment. Once the flour is fully hydrated, cover the bowl with plastic wrap and let it rest for 10 minutes
Bassinage
- After the 10-minute rest, remove the plastic wrap and add the salt and the second portion of water to the dough. Mix on low speed for 2 minutes. Cover the bowl with plastic wrap and let it rest for 5 minutes.
- After 5 minutes, remove plastic, add the 30g of olive oil and mix on medium-high speed (about speed 6) for 4-5 minutes. The dough should be smooth and shiny. Tacky but not sticky. If the dough isn't smooth after mixing for five minutes. See note 3
- Remove the dough from the bowl and place onto floured work surface. Shape it into a ball, transfer it to a lightly oiled bowl, and cover with plastic wrap.If making a 2x batch of dough, and are using two pans, divide the dough into two equal pieces (each dough should weigh about 650g). Shape into balls, and place each into its own oiled bowl. Cover with plastic wrap.
DAY 2 - PROOF & BAKE
Proof
- Lightly oil a 9 x 13 sheet pan with a neutral oil (this helps prevent the parchment from sliding around). Place a sheet of parchment paper on top and drizzle with olive oil. Using your hands, spread the olive oil over the parchment, including the edges of the pan. The amount of olive oil you use depends on your taste, but generally, 2-3 tablespoons should be enough.
- About 1.5-3 hours before baking, remove the dough from the fridge (proofing time will depend on the temperature of the room). Remove the dough from the bowl and transfer it to the prepared sheet pan, smooth side up. Lightly coat the top with olive oil and gently flatten and stretch the dough as much as it will allow (don’t force it; we’ll continue to stretch it as it relaxes). Cover with plastic wrap and place in a warm spot.
- After about 30 minutes, remove the plastic wrap and stretch the dough toward the edges. You don’t need to be overly gentle, but avoid flattening or forcing it. When it doesn’t stretch further, cover with plastic wrap and return it to the warm spot. Repeat this stretching process until the dough reaches all corners and sides. Cover with plastic wrap and return to the warm spot. Now, we wait for the dough to rise and fill the pan.
Bake
- About 15 minutes before your dough is ready to go into the oven preheat your oven to 500℉. See note 4
- Carefully remove the plastic wrap from the dough. Drizzle a little oil on top and dimple the dough (for less oil, you can dip your fingers in oil and dimple it). See note5
- Place the pan in the oven and turn the temperature down to 450℉. Bake for approximately 20-25 minutes, rotating the pan halfway through. The top and bottom should be golden when finished. See note6
Finishing & Cooling
- Remove the focaccia from the oven and transfer it to a cooling rack. If the bread is stuck to the edges of the pan, use a bench scraper to release it. Brush with olive oil and allow to cool fully before cutting.
Notes
- Parchment paper is not necessary if you're using non-stick or well-seasoned cast iron pans. You can also purchase 18" x 13" parchment sheets on Amazon.
- If you're using fresh yeast, increase the quantity to 6g. Crumble and add it to the water, then proceed with the recipe as instructed. I do not recommend using active dry yeast for this recipe (see the explanation in the post).
- Dough isn't smooth after mixing? If the dough isn't smooth after mixing for five minutes, place it in a lightly oiled bowl and refrigerate it. After 20 minutes, give the dough a fold, and again after 40 minutes. The dough should then be smooth. Resume at step 3 under "Bassinage."
- When is the dough ready for the oven? If you're using a 9 x 13 sheet pan, a fully proofed dough should rise to the top of the pan and nearly fill it. Here are some additional indicators to watch for: dough is jiggly and bouncy, and produces bubbles when dimpled.
- Dimpling dough for sandwiches: To avoid large holes in the bottom crust of your focaccia, be gentle and avoid pressing all the way down to the sheet pan.
- Oven times and temperatures: Baking times can vary depending on your oven and pan size. Some ovens run hotter (or colder), have hot spots, or behave differently in convection mode. In a commercial convection oven, I baked this focaccia for 12 minutes at 400°F (500°F preheat).
Nutrition
Serving: 6piecesCalories: 253kcalCarbohydrates: 43gProtein: 7gFat: 6gSaturated Fat: 1gPolyunsaturated Fat: 1gMonounsaturated Fat: 4gSodium: 456mgPotassium: 64mgFiber: 2gSugar: 1gVitamin A: 1IUVitamin C: 0.002mgCalcium: 10mgIron: 2mg
Tried this recipe?Let us know how it was!