







One of the most common challenges in bread baking is knowing when you've mixed or kneaded your dough enough.
A recipe might tell you to knead for 8-10 minutes, or until the dough is smooth and elastic. But mixing times vary depending on your flour, hydration, equipment, and the type of dough you're making.
And while smooth and elastic are useful descriptions, they can be difficult to interpret when you're still learning how bread dough should feel.
That's why I recommend the windowpane test.
It's one of the most reliable ways for home bakers to evaluate gluten development, whether they're making cinnamon rolls, dinner rolls, sandwich bread, or sourdough.
Jump to:
- Quick Answer: What Is the Windowpane Test?
- What Does the Windowpane Test Tell You?
- How to Perform the Windowpane Test
- What Does a Good Windowpane Look Like?
- Why Does My Dough Get Sticky During Mixing?
- Why I Recommend Mixing to Windowpane
- Can You Overmix Bread Dough?
- Watch Your Dough Temperature When Mixing Longer
- Final Thoughts
- Pocket Baker Perspective
- Bread Making: Start Here
- Get the FREE Profitable Baker Pricing Calculator
Quick Answer: What Is the Windowpane Test?
The windowpane test is a method for checking gluten development in bread dough.
To perform the test, gently stretch a small piece of dough between your fingers. If it stretches into a thin, translucent membrane without tearing immediately, the dough has developed a strong, extensible gluten network.
If it breaks apart before it can stretch, it may need additional mixing or time to relax.
For most conventional wheat-based bread doughs, particularly soft rolls and enriched breads, I recommend mixing until you achieve a good windowpane.
It's a more reliable indicator of dough development than mixing for a specific number of minutes.
What Does the Windowpane Test Tell You?
When wheat flour is mixed with water, its gluten-forming proteins begin to hydrate and form a network. As the dough is mixed or kneaded, that network develops, allowing the dough to stretch while maintaining its structure.
This combination of strength and extensibility is important in bread baking.
During fermentation, yeast produces carbon dioxide. A sufficiently developed gluten network helps the dough retain that gas, expand, and maintain its structure.
Without adequate development, dough may struggle to hold its shape or retain gas effectively, contributing to poor volume or a denser finished product.
The windowpane test gives you a way to evaluate gluten development before moving on to fermentation. It doesn't guarantee a successful loaf, but it provides a useful checkpoint during mixing.
How to Perform the Windowpane Test
You don't need any special equipment to perform the windowpane test.
- Take a small piece of dough. A piece roughly the size of a walnut is sufficient.
- Gently flatten the dough. Hold it between your fingers and begin stretching it outward.
- Stretch slowly. Work around the edges, allowing the dough to become progressively thinner.
- Look for a thin membrane. A well-developed dough should stretch thin enough that light can pass through it without tearing immediately.
If the dough resists stretching and pulls back tightly, let the sample rest for a few minutes before trying again. Dough that has just been mixed can be tight, and attempting to stretch it immediately may cause tearing even when gluten development is adequate.
The goal isn't to pull as hard as possible. You're testing whether the dough can stretch into a thin, cohesive membrane - not how much force it can withstand.
What Does a Good Windowpane Look Like?
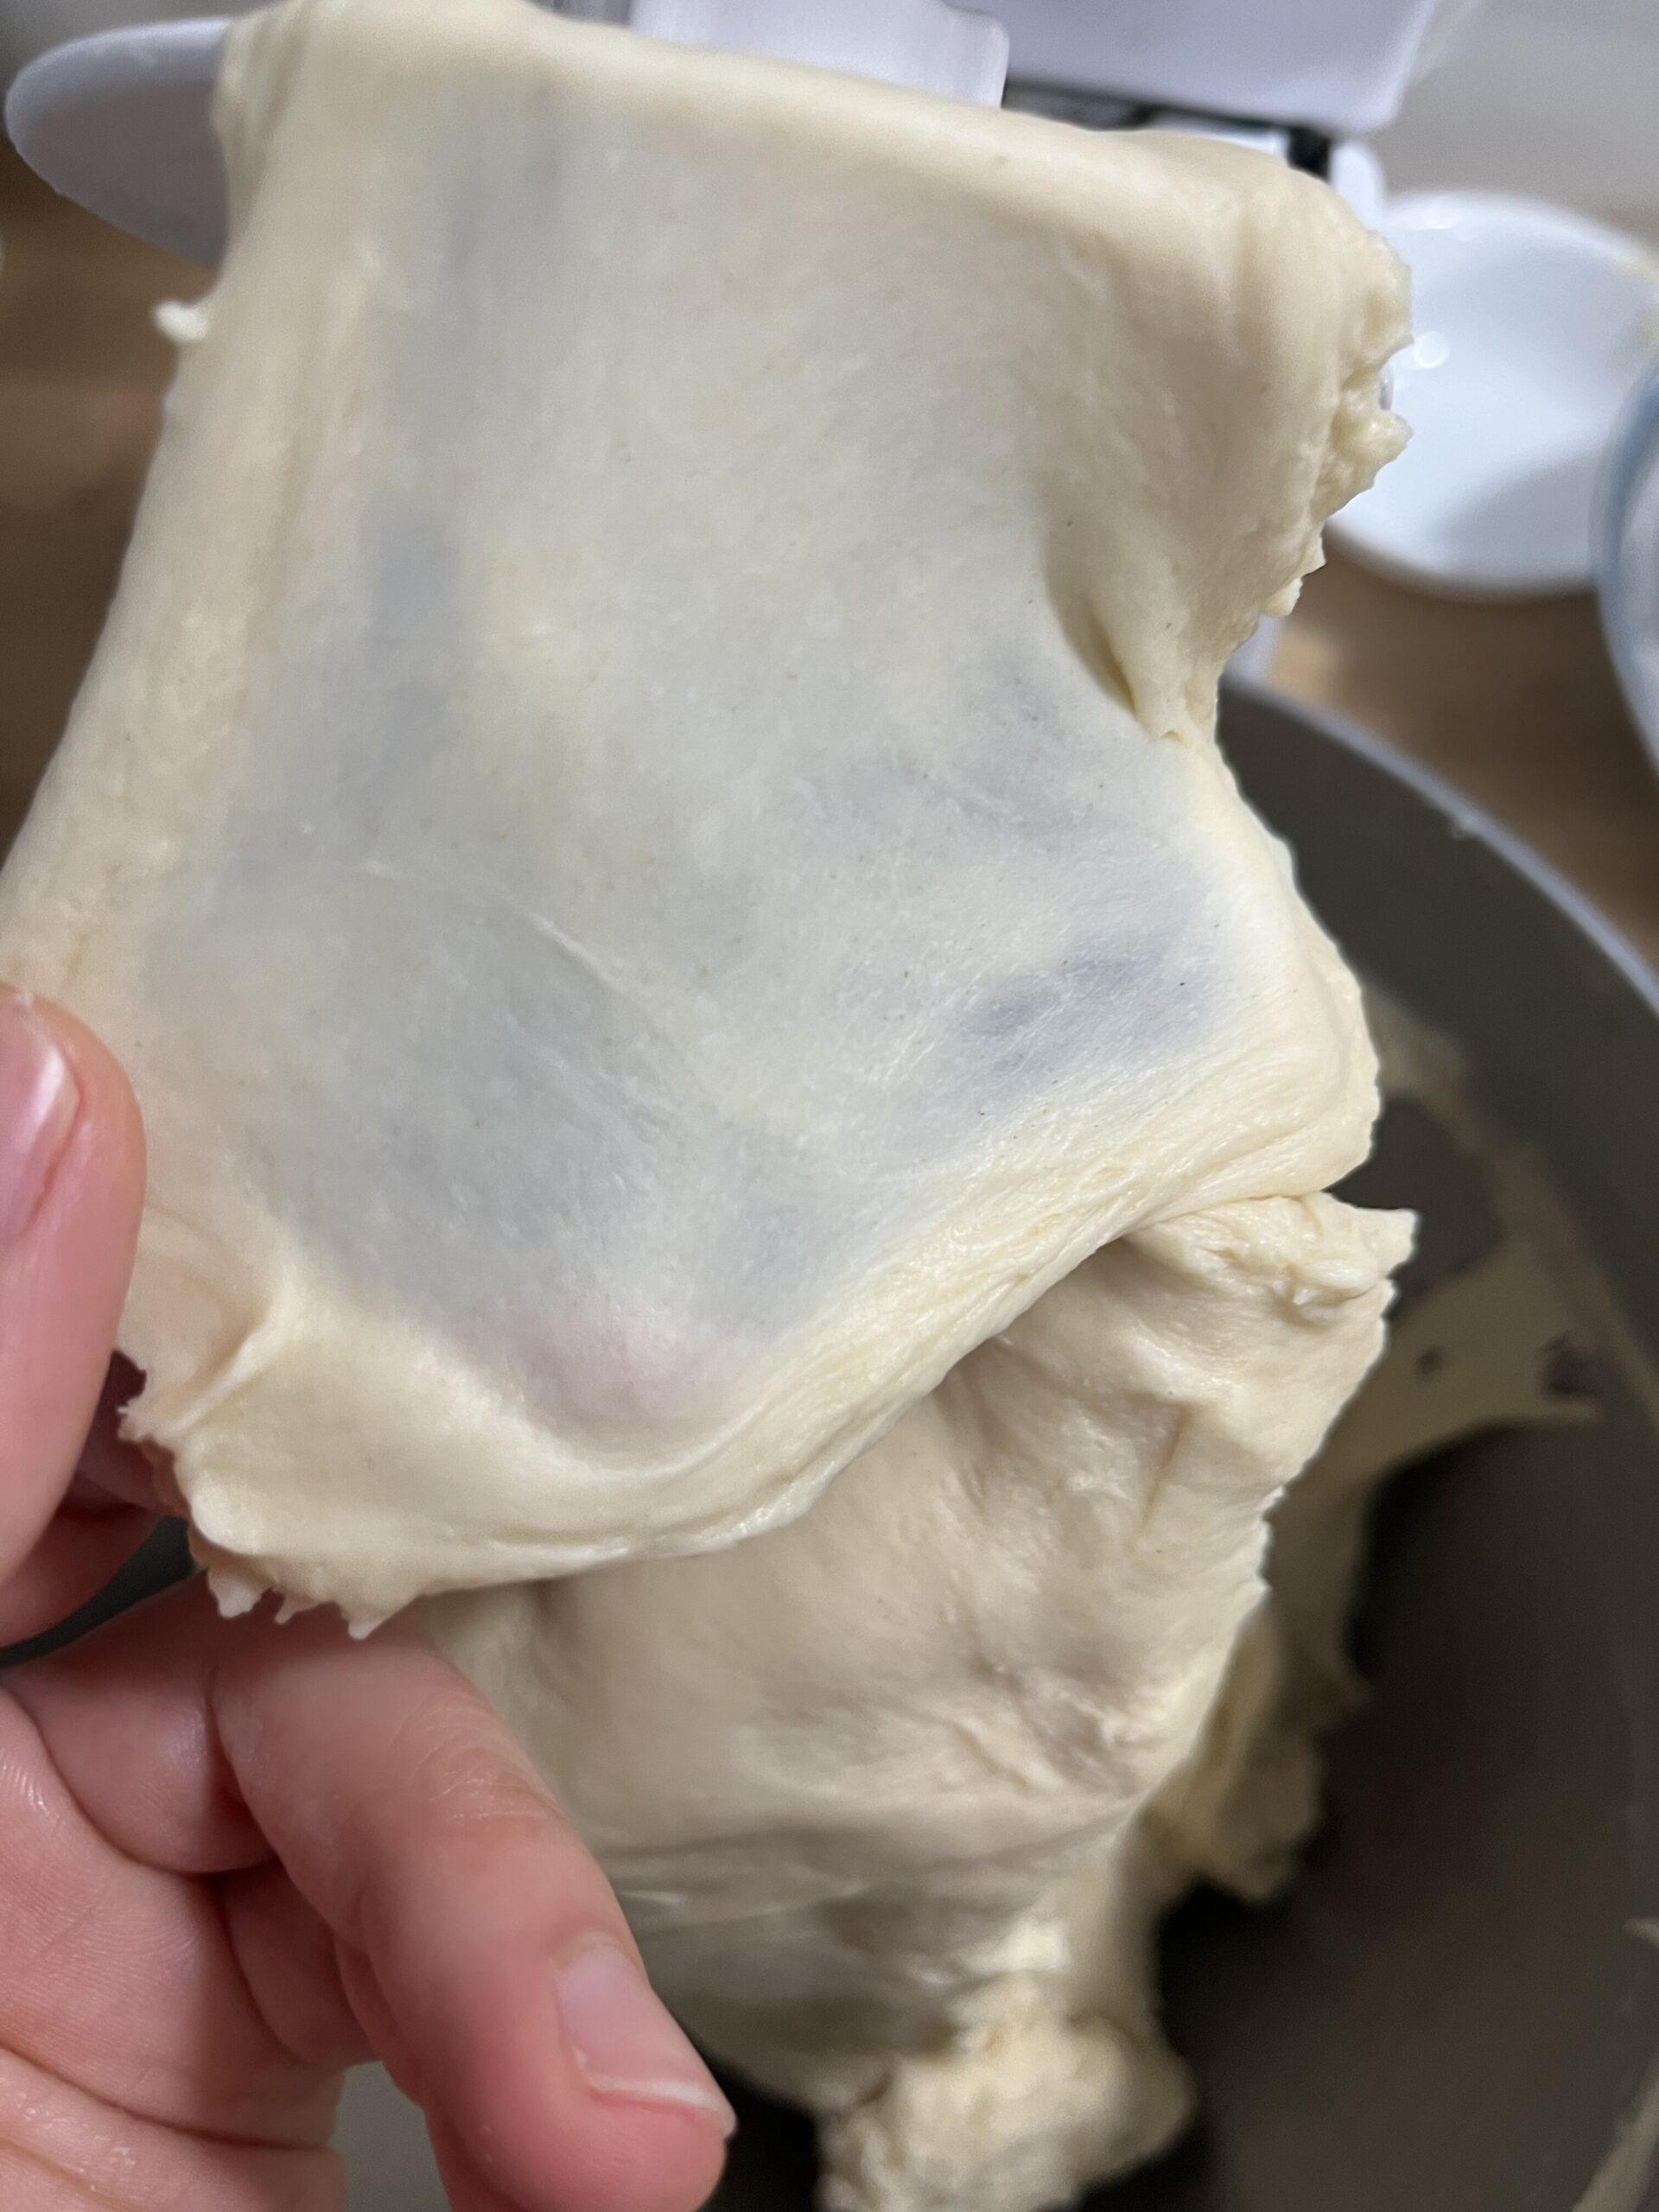
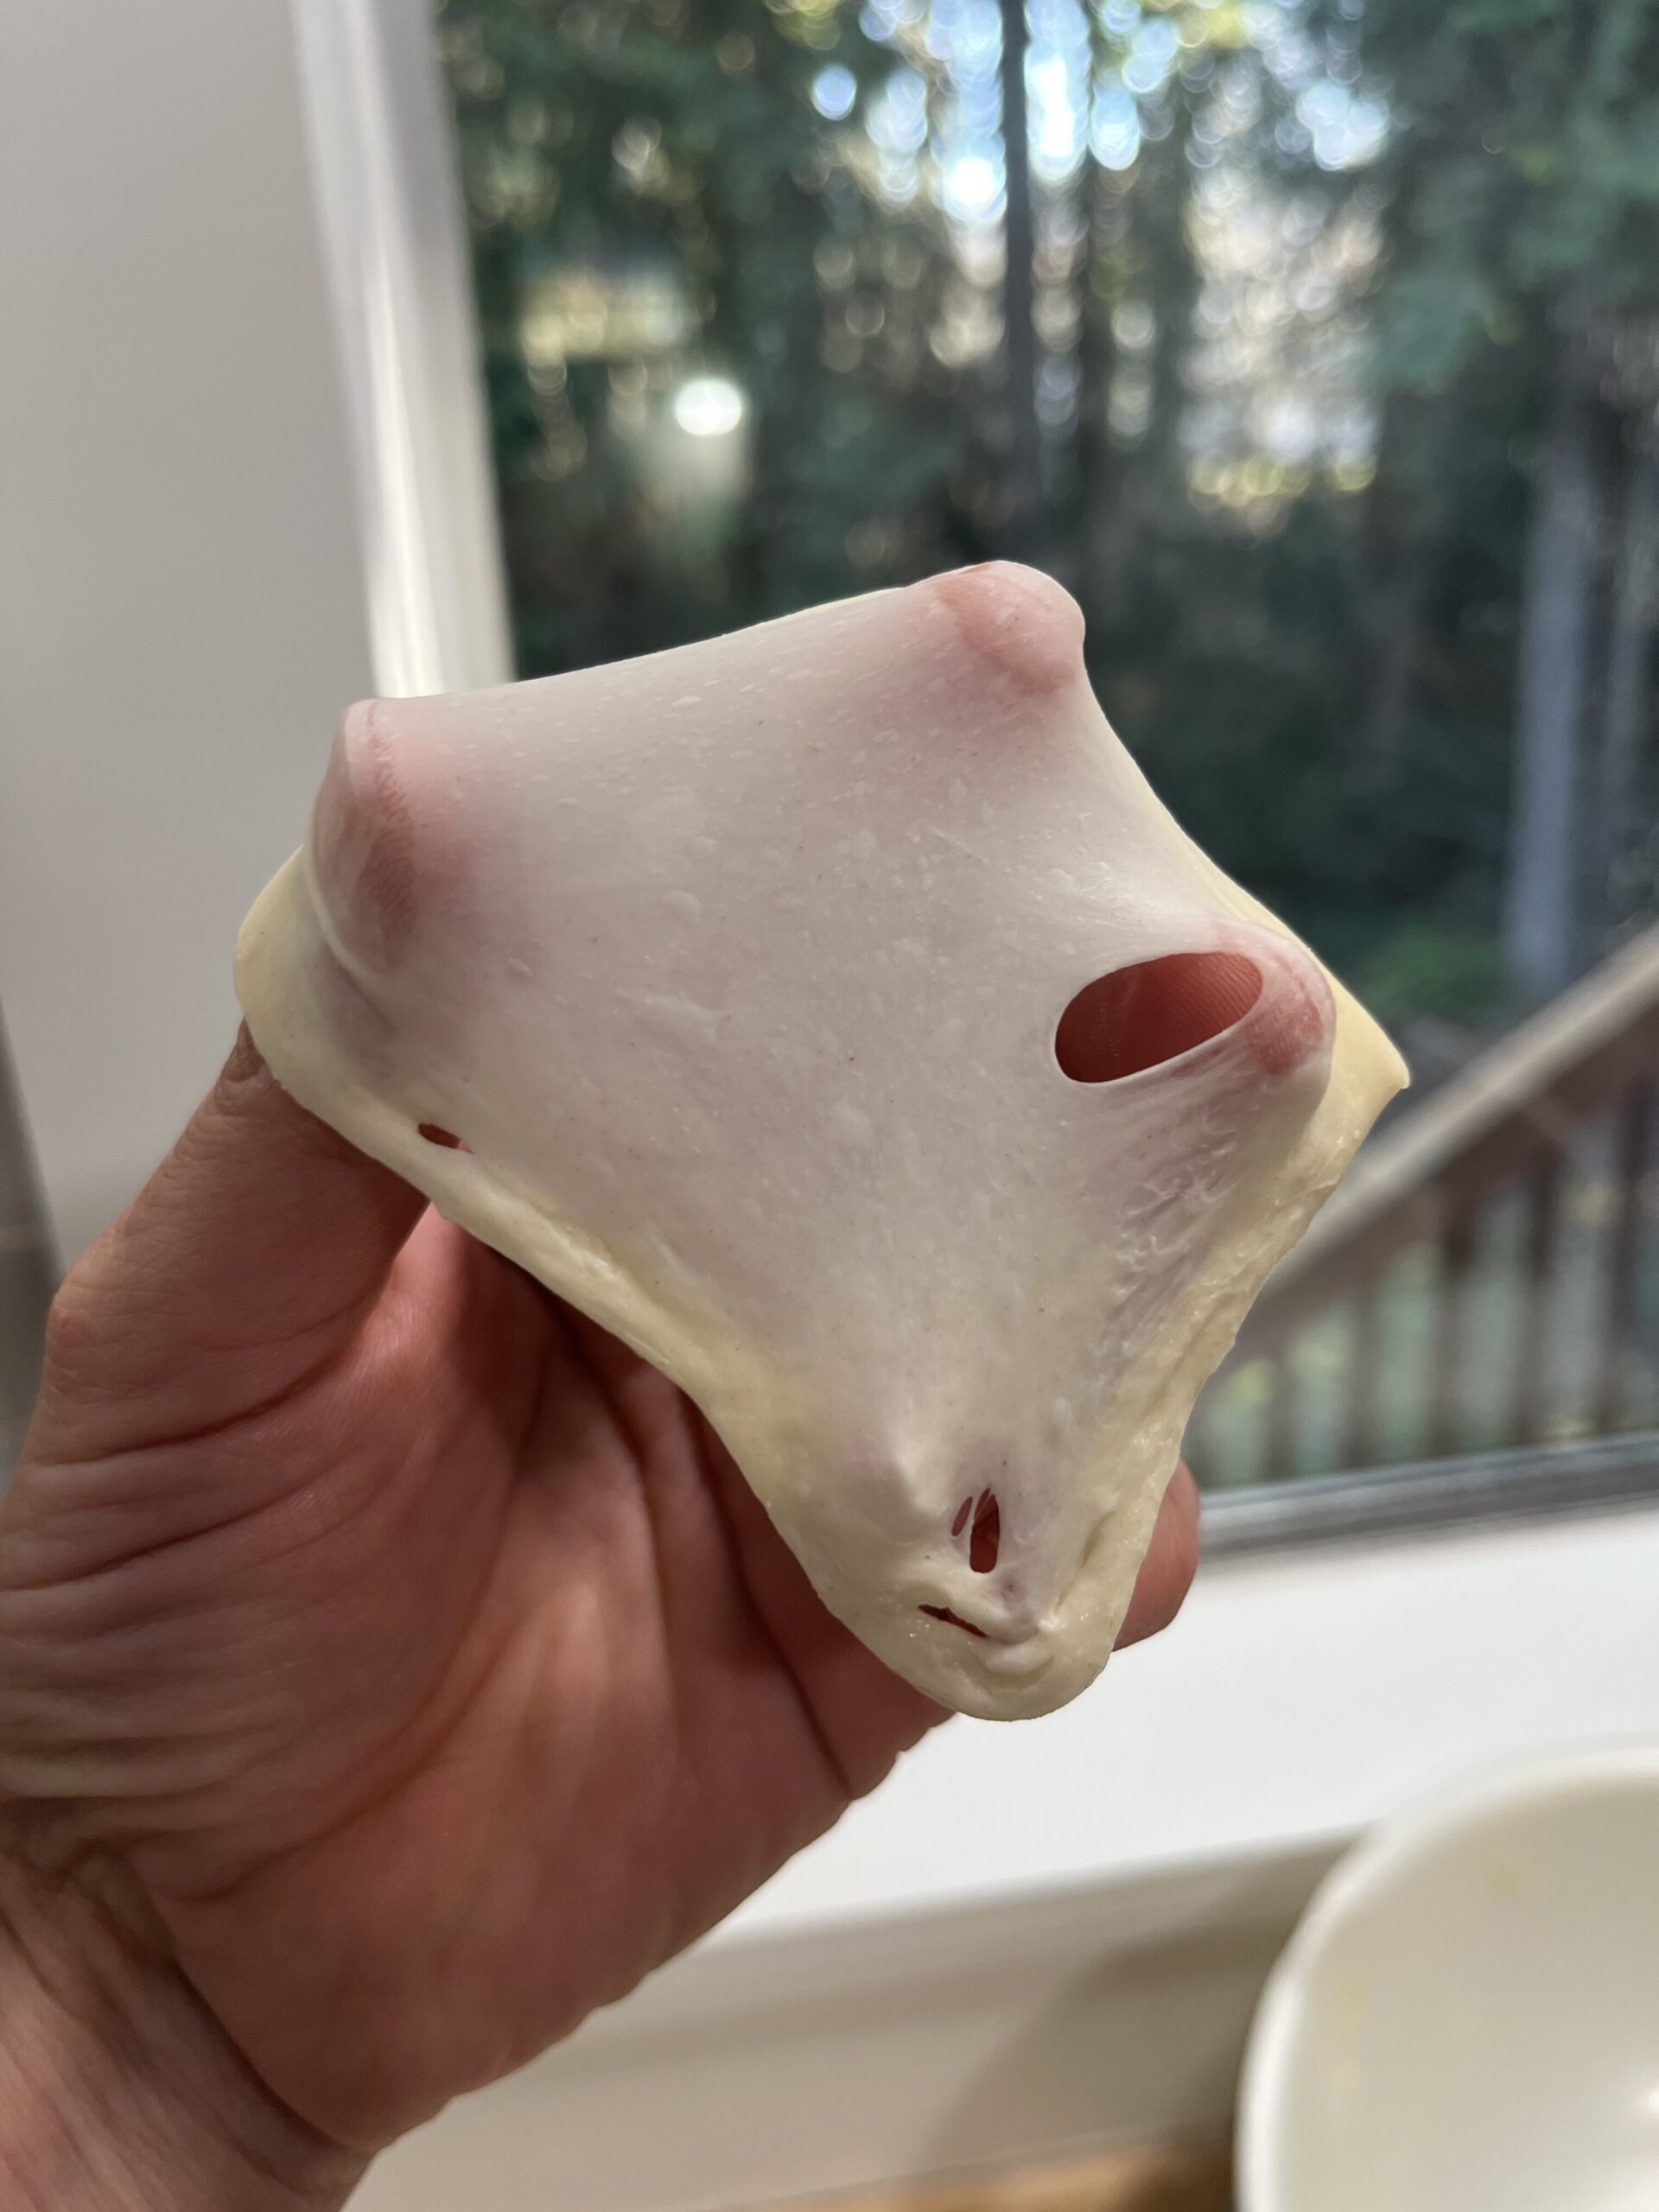
A well-developed dough should stretch into a thin, relatively even membrane before tearing. You may be able to see light - or the outline of your fingers - through the dough.
An underdeveloped dough generally tears much sooner, breaking apart while still relatively thick.
Here's how I would interpret the results:
- The dough tears immediately: It may need more mixing, particularly if it also feels rough, weak, or poorly developed.
- The dough stretches but tears before becoming thin: Gluten development may be progressing, but the dough may benefit from additional mixing or a short rest before testing again.
- The dough stretches into a thin membrane: You've reached a useful indicator of sufficient gluten development for many wheat-based bread formulas.
You can also learn a great deal by observing the dough in the mixing bowl.
As gluten develops, many wheat-based doughs become noticeably smoother, more cohesive, and sometimes slightly shiny. If the dough still looks rough, bumpy, or uneven, it may need additional mixing.
Not every dough will produce an identical windowpane. Whole-grain flour contains bran particles that can interrupt the gluten network, while high-hydration doughs may be more difficult to handle. Rye-heavy doughs behave differently because they don't develop the same type of gluten network as wheat dough.
For these formulas, it's important to understand the dough's characteristics rather than continue mixing indefinitely in pursuit of a perfect windowpane.
Why Does My Dough Get Sticky During Mixing?
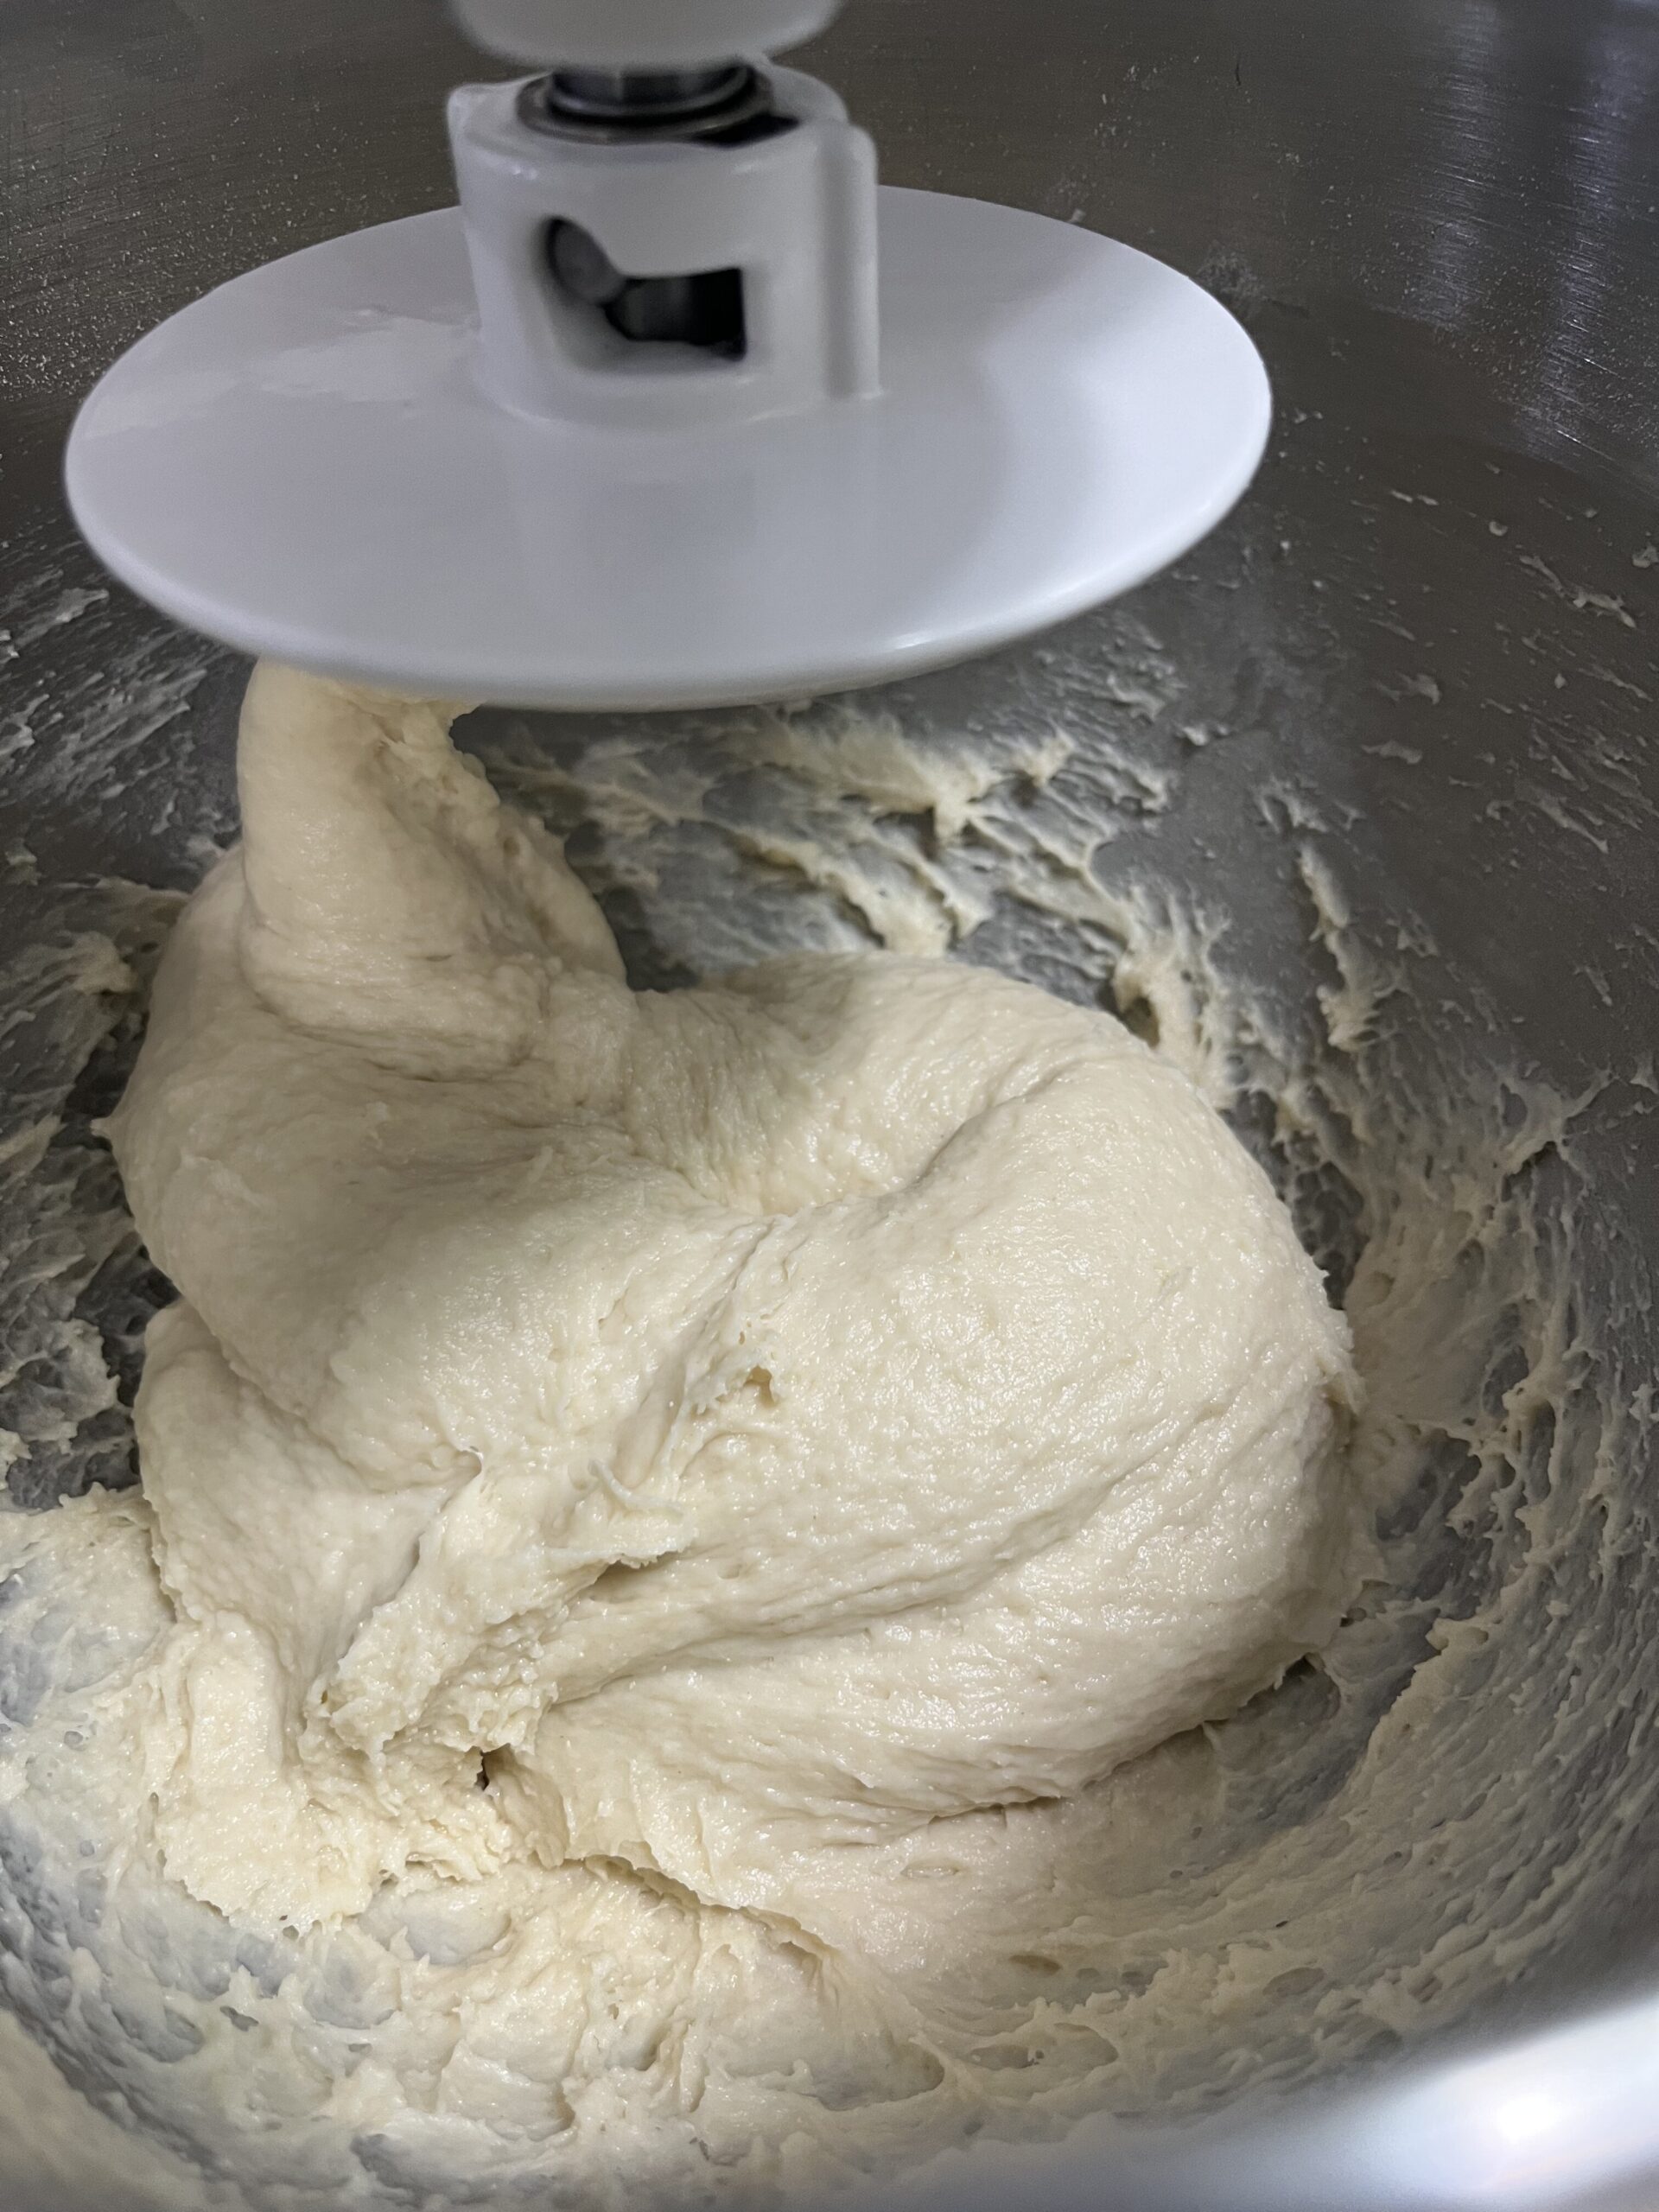
There may be a point during mixing when your dough feels much stickier than you expected.
It clings to your fingers, sticks to the bowl, and doesn't seem to be developing the smooth, elastic texture described in the recipe.
Your first instinct might be to add more flour.
But often, the dough doesn't need more flour. It needs more mixing.
As flour hydrates and gluten develops, the dough goes through changes in texture and consistency. During the early stages, it may feel sticky, rough, or difficult to handle.
As mixing continues, many wheat-based doughs become smoother, more elastic, and easier to work with.
Adding flour too early can change the recipe's hydration, resulting in a stiffer dough and potentially a drier finished product.
This doesn't mean you should never adjust the flour. Different flours absorb water differently, and some doughs are intentionally quite sticky, even when fully developed.
But before reaching for more flour, give the dough time to develop.
Stickiness alone isn't a reliable indicator of whether your dough needs more flour.
Why I Recommend Mixing to Windowpane
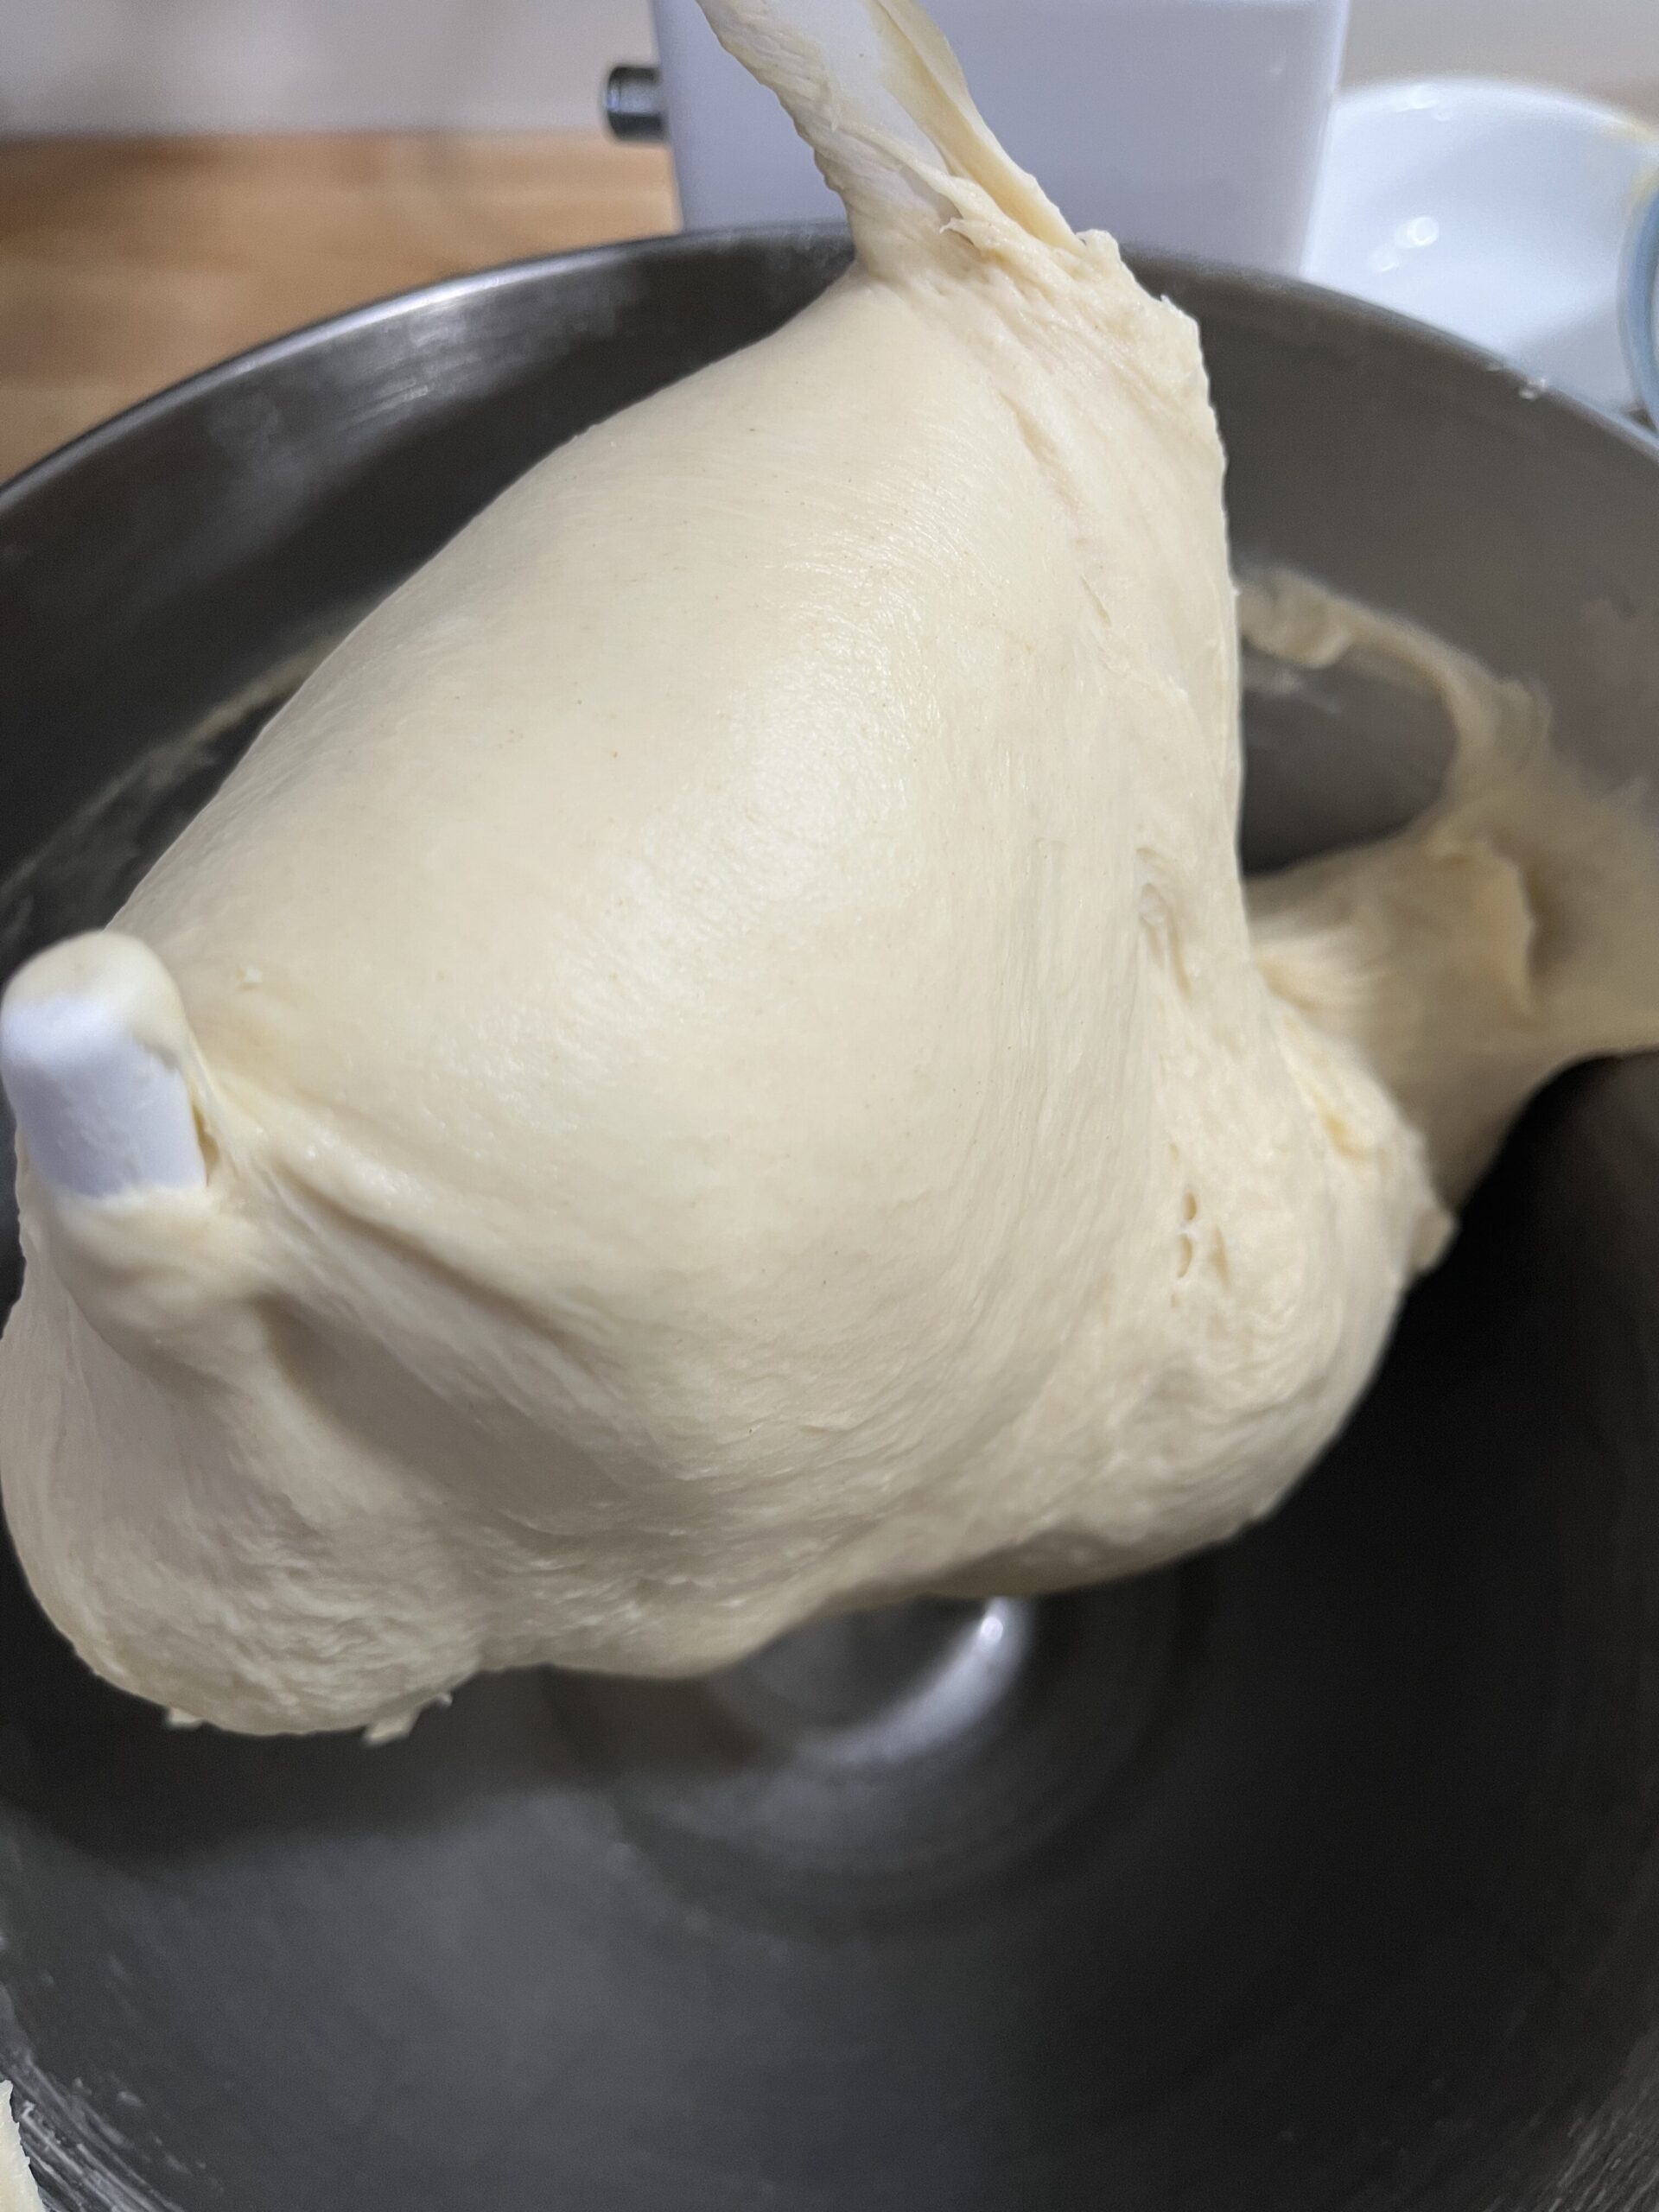
Professional bread bakers don't always mix dough to full (intensive) gluten development.
Depending on the bread and production method, they may use shorter mixing times and rely on folds, bulk fermentation, and time to develop additional strength.
But professional bakers also understand how those stages work together. They can evaluate the dough during mixing, anticipate how it will change during fermentation, and adjust their process accordingly.
That's a skill that develops with experience.
For someone new to bread baking, it's much more difficult to judge whether a dough has been mixed sufficiently based on appearance or feel alone. And if the dough is underdeveloped, the baker may not recognize the problem until much later.
That's why I would generally rather see a beginner mix a conventional wheat-based dough to a good windowpane than stop mixing too early.
This is especially useful for enriched doughs like cinnamon rolls, dinner rolls, and soft buns, where sufficient gluten development helps support a soft, well-risen finished product.
Gluten development can continue beyond mixing, and folds can strengthen the dough during fermentation. Experienced bakers may intentionally use less mixing because they know how the remaining stages will contribute to development.
But you don't have to rely on folds and fermentation to compensate for limited mixing.
For home bakers still learning to recognize proper dough development, establishing a well-developed gluten network during mixing is a reliable starting point.
Can You Overmix Bread Dough?
Yes, bread dough can be overmixed, but it's much less common in home kitchens than many bakers think.
In fact, undermixing is a far more common problem, particularly with enriched doughs like cinnamon rolls and dinner rolls.
As dough mixes, its gluten network becomes stronger and more elastic. But with excessive mechanical mixing, that structure can eventually begin to break down.
When this happens, dough that was previously smooth and elastic may become unusually soft, sticky, or almost soupy. Instead of gaining strength, it loses its ability to hold together.
Reaching this point is difficult when kneading by hand and relatively uncommon with most home stand mixers.
My recommendation is not to stop mixing early out of fear of overmixing.
Instead, watch how the dough develops. As it becomes smoother, more cohesive, and often slightly shiny, check whether it can stretch into a good windowpane.
Once you've achieved sufficient development, there's no need to continue mixing unnecessarily.
For a more detailed explanation, see Can You Overknead Dough? (Why It's Less Common Than You Think).
Watch Your Dough Temperature When Mixing Longer
One important consideration when mixing dough to windowpane is that mixing generates heat.
As dough moves through a stand mixer, friction causes its temperature to rise. The longer you mix, the more significant that temperature increase can become.
This matters because dough temperature affects fermentation, gluten behavior, and how the dough handles.
Rather than letting your mixer run continuously without checking the dough, pay attention to its temperature and condition.
- Monitor dough temperature during extended mixing, particularly when using a stand mixer.
- Watch for dough that becomes excessively warm or unusually soft.
- Consider your ingredient temperatures before mixing, especially if your mixer generates substantial heat.
Different doughs have different desired final dough temperatures. However, for many conventional yeast breads, a finished dough temperature around 75-80°F (24-27°C) provides a reasonable starting point unless the recipe specifies otherwise.
The important thing is to recognize that gluten development and dough temperature need to be managed together.
Final Thoughts
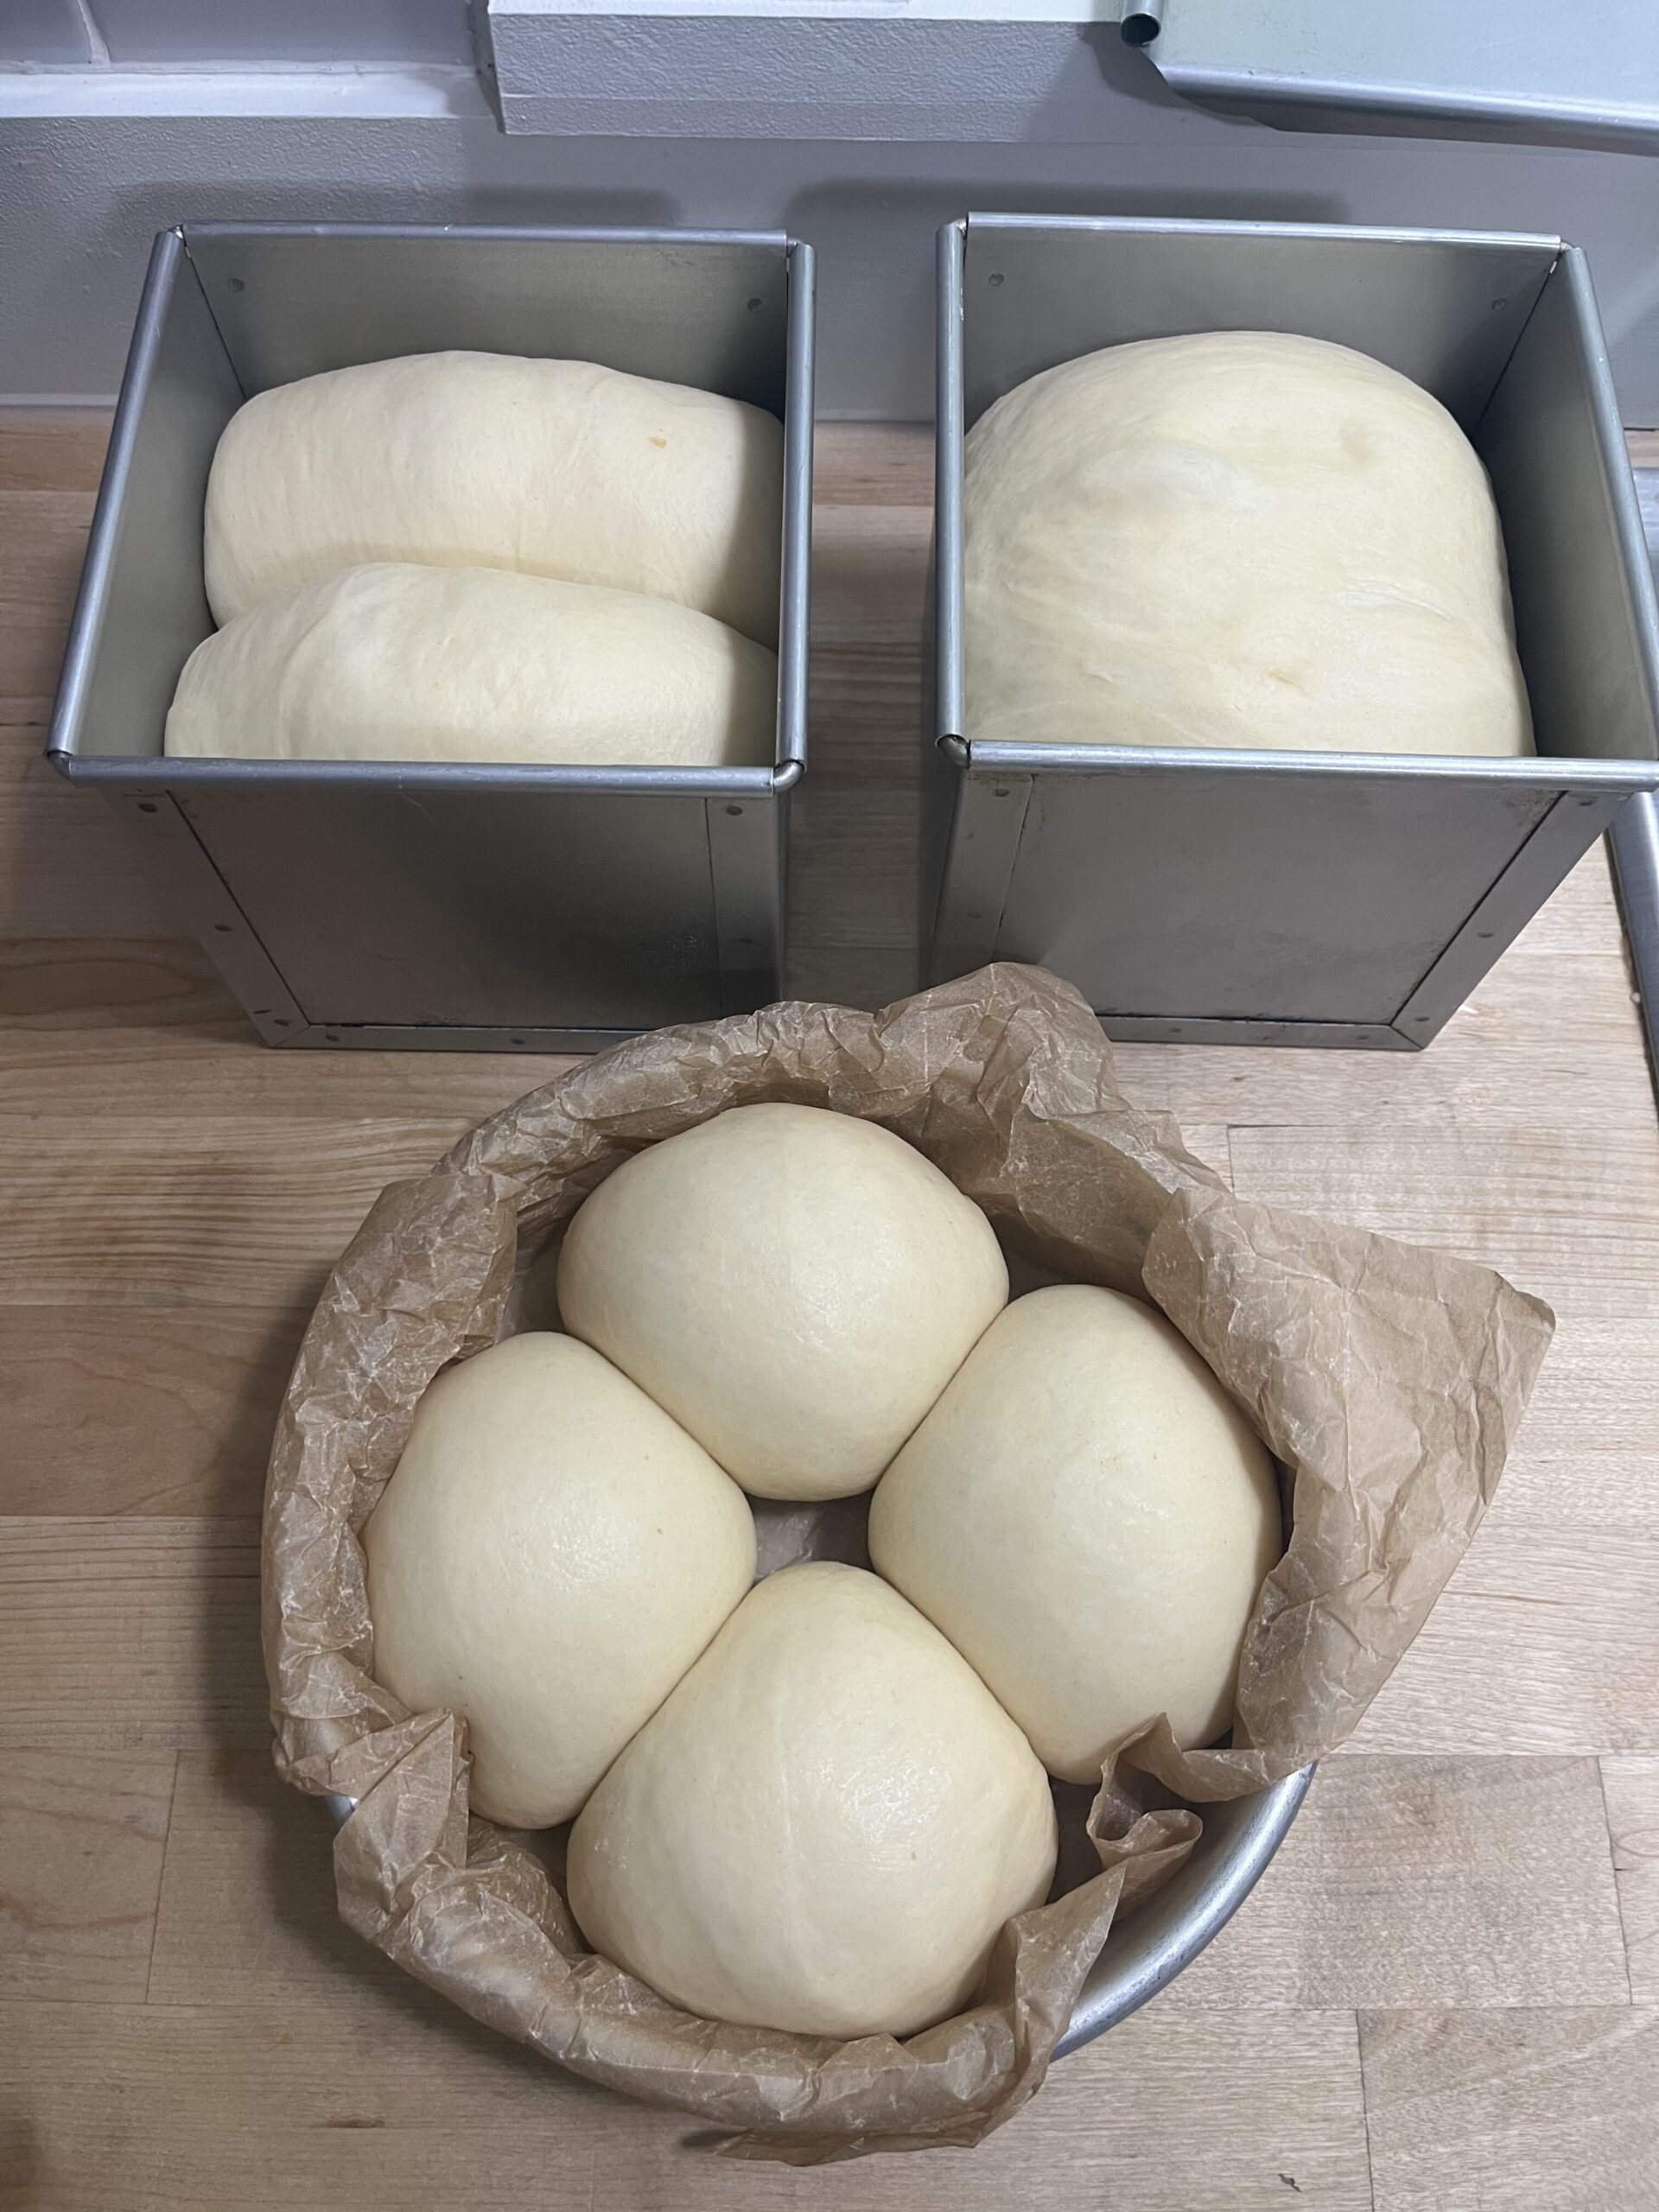
The windowpane test is one of the simplest ways to take the guesswork out of bread mixing.
For most home bakers, particularly beginners making cinnamon rolls, dinner rolls, and other wheat-based breads, I recommend aiming for a good windowpane rather than relying entirely on mixing times.
Don't stop prematurely because you're afraid of overmixing. Develop the dough sufficiently, monitor its temperature, and use the windowpane test to help determine when it's ready.
Pocket Baker Perspective
In professional bakeshops, mixing times and dough temperatures are often closely controlled.
Water and milk temperatures may be adjusted throughout the year to account for changes in the kitchen environment, and the heat generated by the mixer is factored into the process.
For established formulas, bakers generally know how long the dough needs to mix at each speed. The process becomes routine: mix on first speed, move to second or third speed as required, check the dough's development, and proceed to bulk fermentation or refrigeration.
These decisions are based on experience, familiarity with the equipment, and an understanding of how the dough will develop throughout the remaining production stages.
I take a similar approach to gluten development in my own baking, even when working with doughs that undergo long fermentation.
For example, I still mix my sourdough to windowpane, even though it receives folds during bulk fermentation and spends one or two nights in the refrigerator.
My focaccia is another example. It's a high-hydration dough that requires bassinage - adding part of the water gradually during mixing. Although achieving a traditional windowpane can be more challenging, I still mix until I get as close as practical. That dough receives just one fold before refrigeration.
In both cases, I prefer to establish a well-developed gluten network during mixing rather than depend entirely on the later stages to build strength.
And while I have a professional baking background, I wouldn't describe myself as a highly specialized bread baker. I still find the windowpane test to be one of the most dependable ways to evaluate my dough.
If I could recommend one thing to a beginning bread baker who consistently struggles with dough development, it would be to learn the windowpane test and use it.
Bread Making: Start Here
If you're trying to become a more confident bread baker, it's helpful to understand how each stage of the process builds on the next.
Step 1: Understand the Bread-Making Process
Start by learning how bread comes together from beginning to end.
👉 Bread Making Explained: The 12 Steps That Matter
Step 2: Build Strong Dough
A well-developed dough is the foundation of good bread.
👉 Why Is My Dough Sticky? (And How to Fix It)
👉 Why Is My Dough Not Smooth or Elastic? (And How to Fix It)
👉 How to Knead Dough Properly (And How to Know When It's Ready)
Step 3: Master Fermentation & Proofing
Learn how yeast, time, and temperature affect your dough.
👉 Do You Really Need to Proof Yeast? (Instant vs Active Dry Explained)
👉 How to Proof Bread in the Oven (Without Overproofing It)
👉 How Long Should Bread Proof? (And How to Know When It's Ready)
Step 4: Troubleshoot Your Bread
If something doesn't turn out as expected, these guides can help.
👉 Why Is My Bread Dense? (6 Common Causes and How to Fix Them)
👉 Can You Overknead Dough? (Why It's Less Common Than You Think)
Step 5: Apply It to Specific Bakes
See how these same principles apply to enriched doughs and specialty breads.
👉 Troubleshooting Cinnamon Rolls (Fix Dense, Dry or Flat Rolls)
👉 Are All Cinnamon Roll Recipes Basically the Same? (Here's What Actually Matters)